Designing with Light: Gilding a Wall

Tags

, , , ,

I’ve been working on my dining nook for a while now, trying to bring it all together. It’s not much of a space: about five feet wide and twelve feet long, basically a glorified hallway between the front and back of the apartment. I decided to gild the wall with aluminum leaf.

Why gild at all? It’s slow, smelly and incredibly messy. Here’s why: because it’s amazing what a difference a reflective surface can make. Plus it’s really fun!

This is the darkest corner of the apartment. It gets eastern light in the morning, and once the sun moves, gloom descends. So I have to put something reflective on the wall to bring in light, and I’m not a big mirror gal. And the wall is a workable size, about 4 feet tall, manageable by myself.

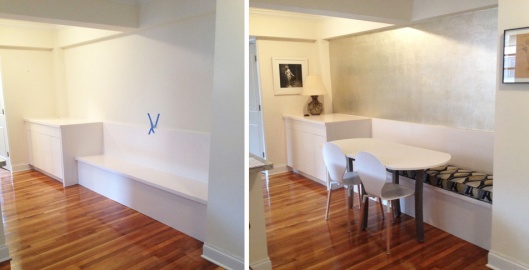
Here’s what I started with, a freshly installed banquette bench with cabinetry and a very white wall.

D:Start

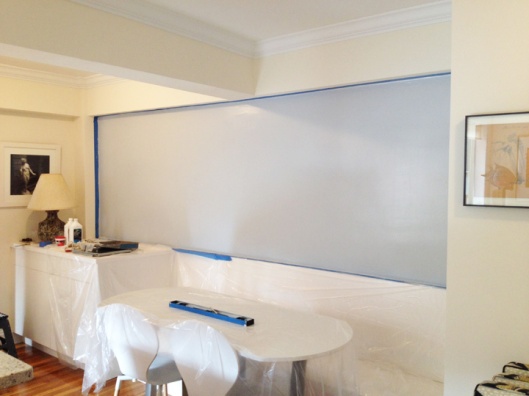
First step, prep: protect everything with plastic, tape out the wall with low-tack tape, then base coat in an oil-based light grey, similar to the tone of the aluminum leaf.

D:Grey

D:GreyStr

The trickiest part of gilding is staying level and square. Drawing parallel lines on the surface with a sharpie lets me know where the leaf should go. The lines are 6 inches apart because that’s the width of the leaf.

D:Grid

The leaf is stuck to the wall using oil size, a type of glue. The size is rolled on with a regular paint roller, then brushed out with a natural bristle brush. It has to come up to the correct tack before the leaf can be applied, which takes about 90 minutes, depending on how much it’s been diluted. The surface is workable for several hours.

I’m using rolls of ribbon leaf, cut into sections five squares wide. Gilding with individual leaves would take forever; this makes the job much easier and creates better results.

D:Roll

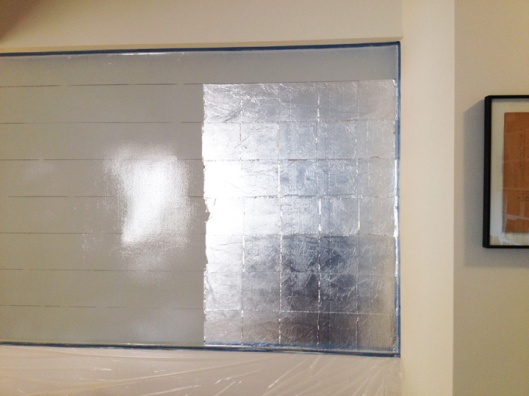
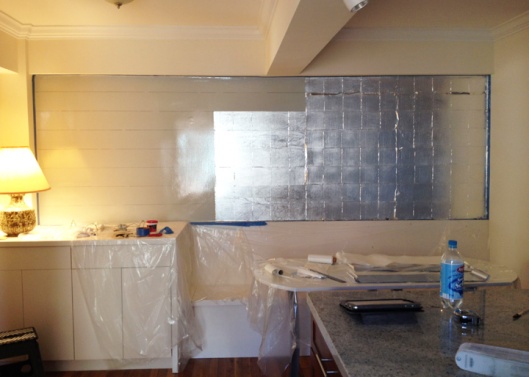
And then it’s time to start gilding, from bottom to top and right to left. From the bottom so leaf doesn’t fall onto the sized surface, and from the right because mistakes will be made at the beginning.

D:StartGild

D:GildMid

D:GildDone

Each leaf overlaps the next one by 1/8 of an inch. So when the wall is done, all of that overlap is fluttering in the breeze.

G:GildClose

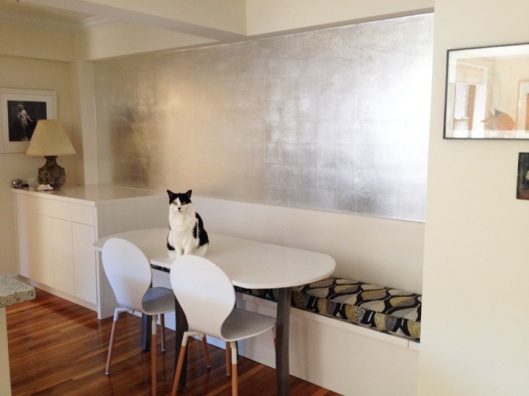
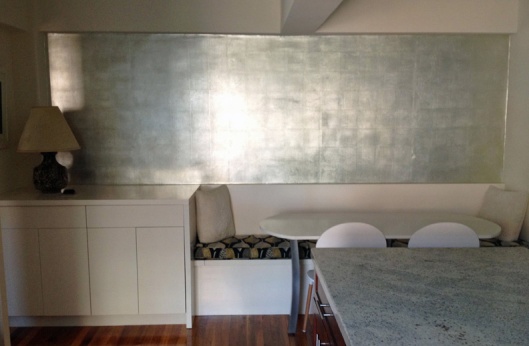
Once the wall has dried overnight, the overlap is cleaned off with a soft brush, which creates a huge mess, tiny bits of leaf floating off in all directions. Below is the completed wall. As the photos above progress, you can see the light leaving the room as the morning sun moves to the south.

I turned off the lights to show how much the leaf reflects indirect light.

D:GildClean

So here we are with everything back in place.

D:Roo

Tons of light, right? And the wall changes as the light changes. What a difference. But I’m not done; aluminum looks very cold and hard, and I don’t want the dining nook to feel chilly. The wall needs an overglaze to knock back the reflection and warm it up.

To coordinate with the green in the bench cushions, I mixed a dirty green. Green is one of those colors that can read as cold or warm, depending on what it’s next to, since it’s a mix of blue and yellow, cold and warm.

D:GlazeColor

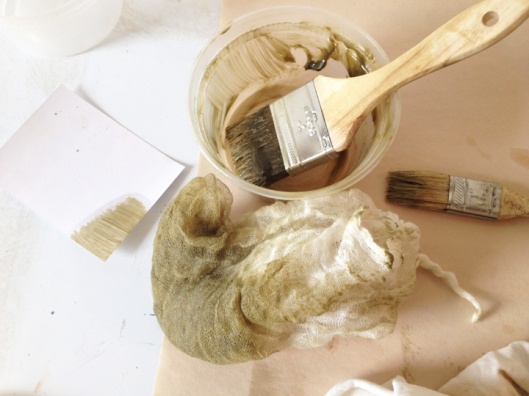
The glaze is made with Windsor and Newton Liquin mixed with tube oil colors. Liquin is an oil-based medium used to speed drying time, and it’s the only medium I know that stays translucent over gilding. The glaze is applied with a chip brush and gently pounced with cheesecloth to give it a bit of texture.

D:OGlazeStart

D:OGlazeMid

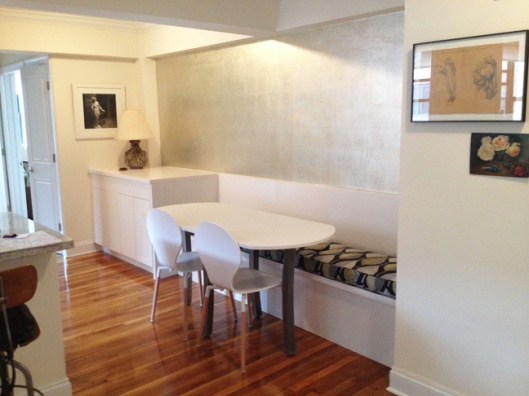
Even though the green seems really strong as it goes on, it ends up looking subtle. The refection of the leaf is no longer glaring, although it still softly reflects, the tone is warmer and now the wall is visually integrated with the dining nook’s palette.

A couple of shots of the finished wall with the lights off in the late afternoon. The light from the window across the room now bounces off of the leaf.

GAfter2 GAfter1

And with the lights on.

D:End

Before and after. Still waiting for my light fixture to arrive.

Double

The table is custom made and I love it. That’s a story for another day!

Finding an Old Growth Forest in Manhattan

Tags

, , , , ,

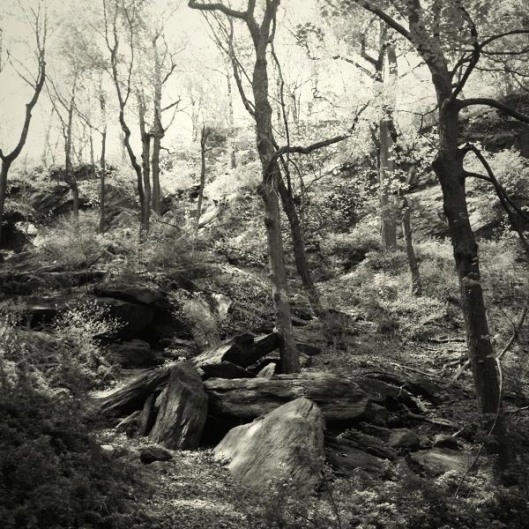
The best thing about moving to a new neighborhood is exploring. A few weeks ago, I dove into the depths of Inwood Hill Park, a 200-acre park at the northwestern tip of Manhattan, about ten blocks north of my apartment. I’d heard, “Be careful, it’s lightly traveled, be alert.” But I finally got fed up with being worried about what might or might not happened if I went for a walk. So who did I meet? Dog walkers, some joggers, couples on romantic strolls and a dad taking his toddler for a walk. Not so fearsome after all! InForest2

Best of all, I discovered a fantastic new place.

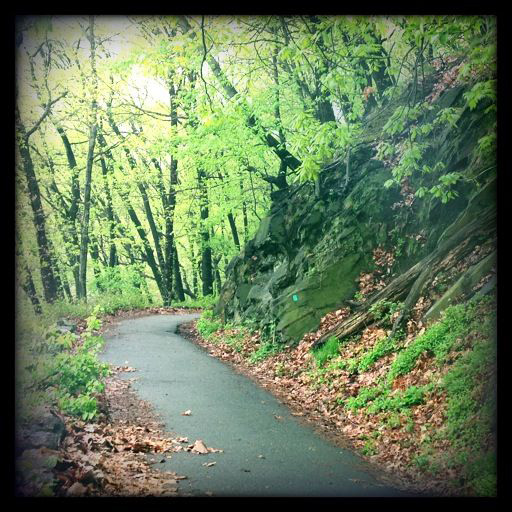
IHPath

This is a thickly forested park, hilly and rocky, and contains the last old growth forest in Manhattan. It’s full of birds and small mammals, secluded and beautiful. Just the place to take a walk to clear your head.

IWWoods

Inwood Hill Park is shaped like a big comma. Here it is seen from the north, with the Hudson River on the right (west) and the Harlem River at the bottom of the photo (north). Henry Hudson Bridge is in the foreground, connecting Manhattan to the Bronx. The rest of Manhattan stretches south into the distance. The area where the two rivers join is home to the last saltwater marsh in Manhattan, which attracts diverse bird life.

InwoodHillPhoto

Although the Henry Hudson Parkway runs right through the park, you wouldn’t know it. It’s separated from the rest of the park by a cliff, which muffles the sound if you’re in the valley to the east. A few ballfields and meadows are the only landscaped areas in the park. As you can see, it’s almost completely forested. This photo shows how unexpectedly green Upper Manhattan is!

Here’s a short video I shot of the old growth forest, with a few details of its history.

There’s a long legacy of Native American tribes in this area. As legend has it, the agreement that passed Manhattan from the Lenape Indians to the Dutch (in exchange for trade goods valued at 60 guilders) was made here in 1626. The Lenape, an Algonquin tribe, are the original New Yorkers, and lived here for about 10,000 years before the Europeans showed up and ruined everything for them. “Manhattan” is derived from the Lenape “Mannahatta,” which means, “Island of Many Hills.”

SaleManhattan

Here’s a look at the “Indian Caves,” in the valley that’s now called The Clove. The Indian Caves aren’t really caves, they’ve more like overhangs, and were probably used for resting, not living. Bits of pottery and detritus from hunting have been found here.

InForest3

The topography is a result of shifting glaciers.

IHCave3

IHCave2

There are at least three freshwater springs in the park, and the high canopy, dense underbrush, extensive shelter and lack of predators make it ideal for wildlife. This is a prime birding spot in Manhattan, especially during migration, since the thick forest is perfect for resting and foraging. Over 200 species either live here or pass through annually. Small mammals love it here, too. Skunks, raccoons, bats, groundhogs and lots of squirrels and other small rodents are common. I’m still hoping to see a rabbit. The forest is lightly traveled by people, and dogs are not allowed off the leash.

Here’s a link to the NYC Audubon site if you’d like to know more about birding in this park.

Even under the Henry Hudson Bridge, it’s beautiful. Some paths are cut into the cliffs and take you high above the rivers.

IHBridge

IHRidg

Kids in the Bronx jump off this cliff into the Harlem river. The C is for Columbia University, which has a campus nearby. This is the point where the Hudson and Harlem rivers meet.

IHC

As I began exploring Inwood Hill Park, I started reading a fantastic book that helped me learn about Manhattan’s ecological history, “Mannahatta” by Eric W. Sanderson. It’s an amazing resource, investigating the biological diversity that flourished here before the city developed.

Mannahatta

The best part about Inwood Hill Park is that it’s simply here, that this forest actually survived. It’s great to know that if I need a break from the city, I can wander through the woods for a little while and experience a whole different kind of Manhattan.

IWPath2

Color Matching Madness

Tags

, , , , , ,

Here’s a quick little post about all of the color matching I’ve been up to these days. I love these projects; some are very challenging and others are pure play. I also end up jumping all over town, which is fun.

We’ll start off on Sutton Place on the East Side with a damaged crown molding in a bedroom. It was originally painted as a faux wood burl. Water damage wiped out a long section over the bed between two windows. Here’s the repaired area, just primed.

Burl1

This is the final finish. It took about five hours to base coat, glaze three times, then paint in the black lines. You can still see the water damage on the fabric-covered wall.

Burl2

Next up are a couple of thermostat heat sensors on the Upper West Side. These are placed on walls and are about 1-1/2 inches wide. They usually stick out like sore thumbs. This first one is painted to match a wall upholstered in a velvet fabric with a recessed pattern in a contrasting color. Tricky.

RedButton

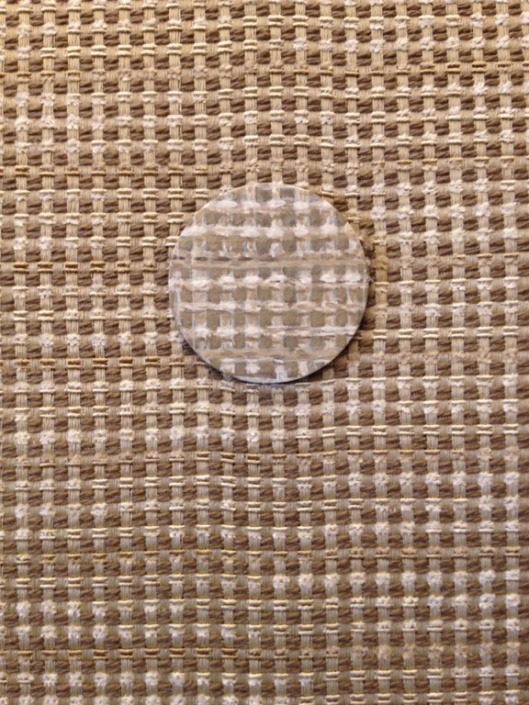
The next one is on a sisal wall covering. The colors look off in the photo, but match in person. The best part of this one was trying to create a three-dimensional trompe l’oeil effect on such a tiny scale.

SisalButton

Below is another wallpaper, a mini tragedy to a home owner on the Upper East Side. The paper was damaged and a new portion was cut in. Unfortunately, the reserve roll didn’t match the paper on the wall. This area is about 4 x 6 inches, between a crown molding and the top of a door frame.

WPaperPatch

I was able to paint it to match by carefully layering on color, but there was no way to hide the cut lines. The client was not happy, but there are some things I can’t do with paint and erasing cut lines is one of them.

WPaperPatch2

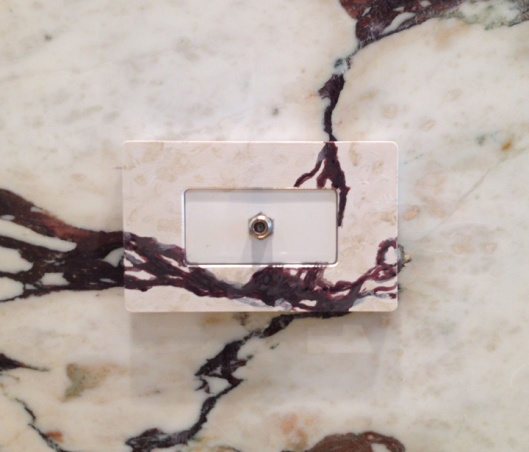
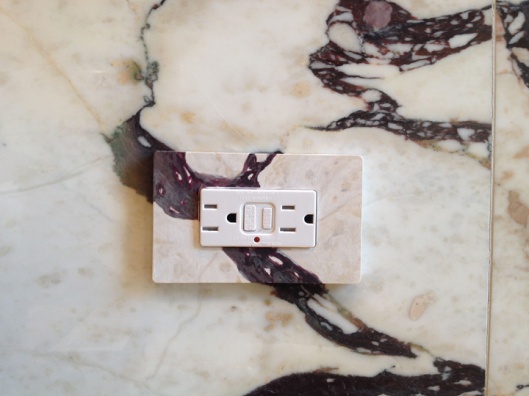
Now we’re getting into the really fun stuff. This violet marble is spectacular; it clads every surface in a tiny powder room. For some reason it was really easy to match, a total blast. In case you ever have to match this marble, here’s the skinny: Permanent Violet Dark combined with Red Oxide and Black.

Violet2

Here’s a close up.

Violet1

The same marble was also used in the apartment’s kitchen.

Violet5

Violet4

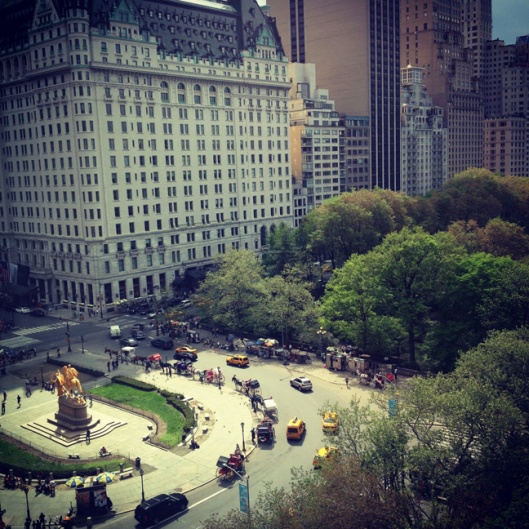
Just for fun, here’s the view from this apartment’s living room. That’s the Plaza Hotel, perched on the edge of Central Park.

Plaza

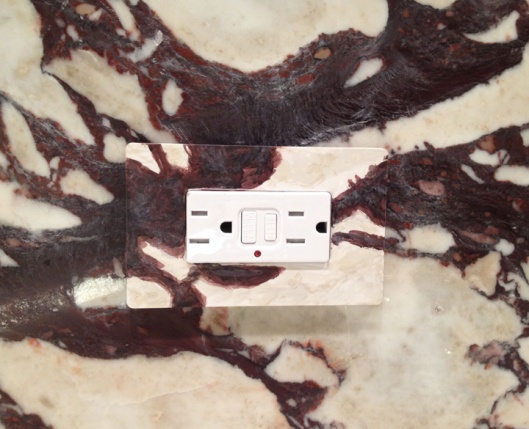
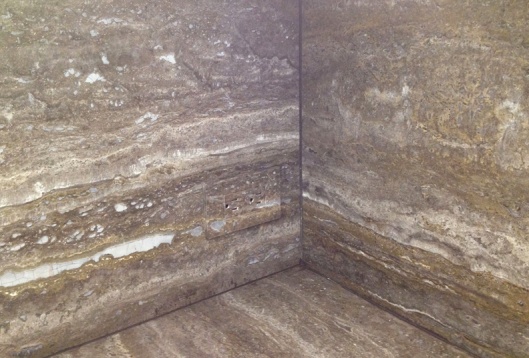
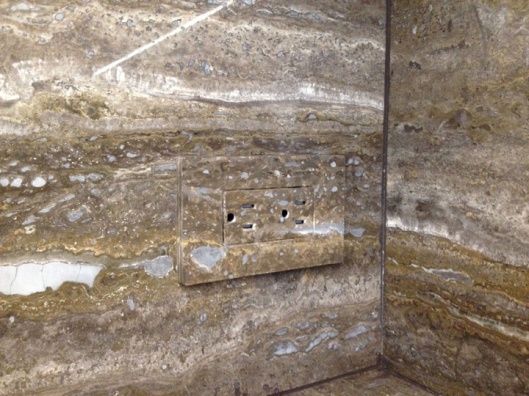
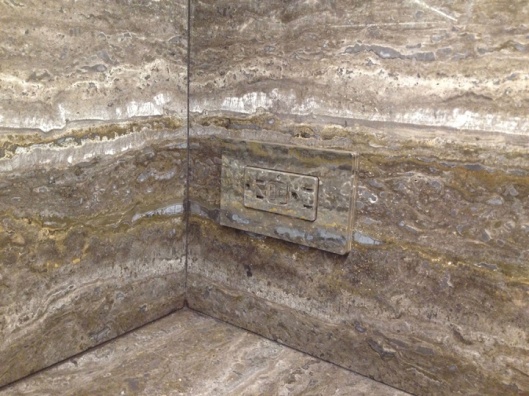
And we’ll finish up on the Upper East Side again, in the bar area of a brand new apartment renovation. Usually when I paint outlet covers, I’m asked to leave the center plug section unpainted because the paint will scratch off eventually with a lot of plugs going in and out. In this case, though, the designer asked me to paint the whole thing, and it let me create a vanishing act.

Love this brown travertine marble. Where’s the plug?

Bar1A

Right there, silly.

Bar1B

And the next corner.

Bar2A

And the third corner.

Bar3A

Bar2B

That’s it for now. Happy weekend, everyone!

Meandering Around Munich

Tags

, , ,

Last week, Tom and I were in Germany to attend my youngest cousin Christina’s wedding, which took place just outside of Munich. We spent a week in the city, wandering all around, Tom sampling wurst for the first time, me chowing down on as many pretzels as possible.

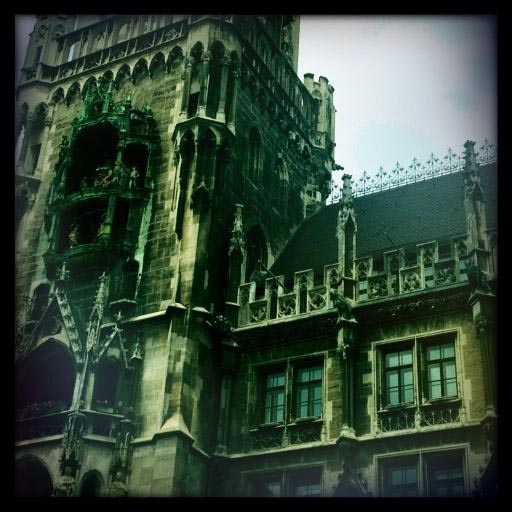
Here we are in Marienplatz.

M:New

M:New2

I love the dragon that’s climbing up the side of the building. What’s he doing there?

M:Dragon

We visited a few churches.

M:Altar

M:Church

M:Ceiling

And admired the beautiful details on the exteriors of buildings.

M:Building2

M:Building

We stopped for lunch one day in this oh-so-Bavarian spot

M:Restaurant

and on another day, visited one of my favorite museums, Lehnbachhaus, full of phenomenal work by German Expressionists.

M:Horse

I liked the details I found as we wandered around the city.

M:Angel

M:Skull


M:Ox

M:Gargoyle

And had a sudden urge to jump on a bike.

M:Bikes

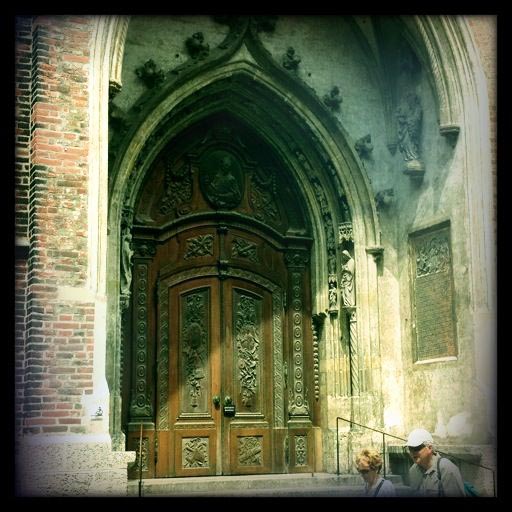
We saw so many beautiful doors. This one had leather inserts.

M:Door

These two belonged to a church.

M:Door2

M:Door3

One afternoon, we went out to the Olympic Stadium.

M:Olym

And finally, the wedding! Notice the Lederhosen sported by the band. Fun was had by all!

M:WedBW

And then it was time to go home again. A short but sweet trip!

M:Back21

M:Back2

Sketchbook: Why Cats Seem Indifferent

Tags

, , , , ,

There are dog people and there are cat people. But when you ask a dog person why they don’t like cats, most respond with words like “cold” and “unfriendly” and “too independent.” I think the problem isn’t that cats are any of these things, it’s that their faces don’t express emotions in the same way as dogs can. And why is this?

It’s because cats don’t have eyebrows.

Dogs have eyebrows. Even if their fur is all the same color, you can still see their eyebrows. And their eyebrows help make their facial expressions easy to read.

ExA

Cats have emotions, too. But without eyebrows to express them, they can seem a little, well, aloof.

ExB

Look at the difference a set of eyebrows can make!

ExC

So the next time you look at a cat and think you’re being completely ignored, please reconsider. That cat may be thrilled to see you! It’s just hard to tell because of those pesky missing eyebrows.

Standing Inside of a Pinhole Camera

Tags

, , , , ,

I went to the Whitney Biennial a few weeks ago, and this week I went back. There was one exhibit I had to see again, created by artist Zoe Leonard. It’s a camera obscura… and it’s the size of a room. You can stand inside of a pinhole camera with the image projected all around you! It’s amazing.

When you step into the room, it takes a minute for your eyes to adjust. Once they have, you realize that you’re completely surrounded by the projected image, which hits all of the walls. Sorry about the quality of these photos, I didn’t bring a tripod. The room is about 50 feet long with ceilings 20 feet high. Here’s the image on the back wall.

Whit1

Here’s the view from the opposite side, now with people for scale. The projected image is upside down and flopped, as it always is in a camera.

Whit3

So this is what’s happening: the room is a light-tight space; all surfaces are painted matte black. The only source of light is the pinhole that’s been created on the window. The light concentrates through this aperture, then projects the light reflected by the buildings across the street into the room, replicating the living, breathing, moving street scene outside.

Whit6

Whit2

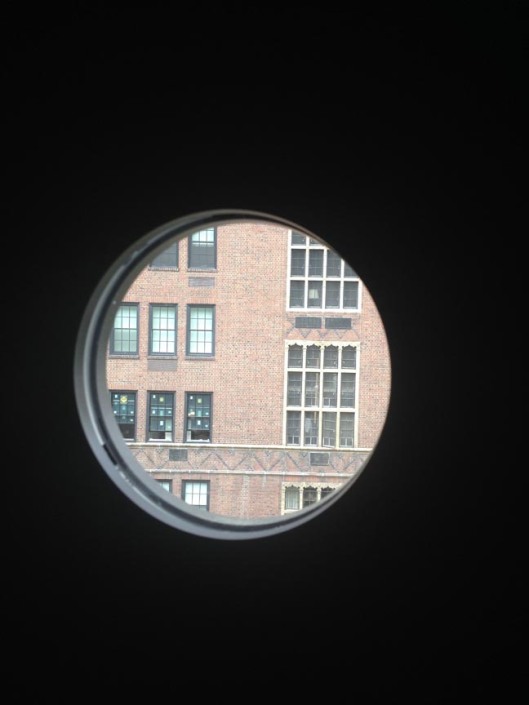
Here’s a close up of the pinhole. It’s about six inches wide and four feet up from the floor. You’re seeing the view outside that’s being projected into the room.

WhitPin

This is what it looks like from the outside of the Whitney’s Marcel Breuer building.

WhitPinExt

These people are standing right in front of the pinhole, facing the image.

Whitney7

In this video below, on a little portion of the wall next to the pinhole, you can see the projected image well (remember, it’s upside down), and you can see the moving cars on the street below. It’s a pinhole movie! You might want to go full screen on this, the area in question is pretty small.

Many people think that in order to create a picture, you need a lens and a photosensitive surface. You don’t. You need light and a dark box. That’s it. This is just physics, and it works whether the space is the size of a walnut or the size of a room at the Whitney. It doesn’t matter if there’s film in there; there’s light, and that creates the image. The photosensitive surface just captures it; the image is there regardless. This is what all cameras do, but it’s magic to see it in action.

Here’s a link to info about the artist, Zoe Leonard, with brighter photos. This isn’t her first camera obscura.

The show’s up until May 25th. Run to this room! It’s on the 4th Floor. I sat in there forever, just staring. A once-in-a-lifetime experience! And only $20. What a thrill.


But What About the Beetles?

Tags

, , , , , , ,

It’s been a while since I’ve posted about decorative paper. Today’s topic: insects, and which ones make the cut as worthy of appearing as decorative motifs on handmade sheets.

Insects are incredible. They’re found almost everywhere, and make up more than half of all the living things on earth. There are several hundred thousand different kinds, surviving in every habitat except the ocean.

Beetles are the most prolific order of insects, exceeding 270,000 species, and are among the most beautiful. With iridescent shells, endless color combinations, along with some crazy shapes and textures, you’d think that they’d be beloved worldwide. Look at these beauties!

InFieldGuide

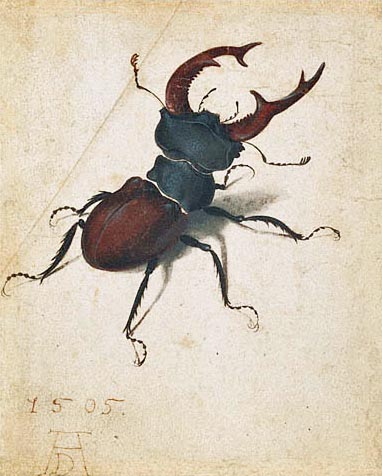
Albrecht Dürer even painted one back in 1505.

In-DurerBeetle

But insects are tricky. Some, the most obviously beautiful, like butterflies and dragonflies, are embraced. The lady bug, a beetle sporting a witty and colorful pattern, not to mention a helpful appetite for aphids, is adored. But despite their visual appeal, most others are ignored or disliked. I suppose that little butterflies floating along a breeze are much more appealing than a hard-backed bug skittering along the edge of your baseboard or a pest munching in your garden.

Although insects are often used as a decorative motif in handmade papers, this bias holds true there as well. Butterflies abound, dragonflies occasionally buzz by, ladybug beetles pop up here and there, but other insects are scarce. I find it interesting that we are so limited in the insects that we find appealing. Even across cultures that make paper, the papers produced still adhere to a limited view of which insects are deemed acceptable for viewing.

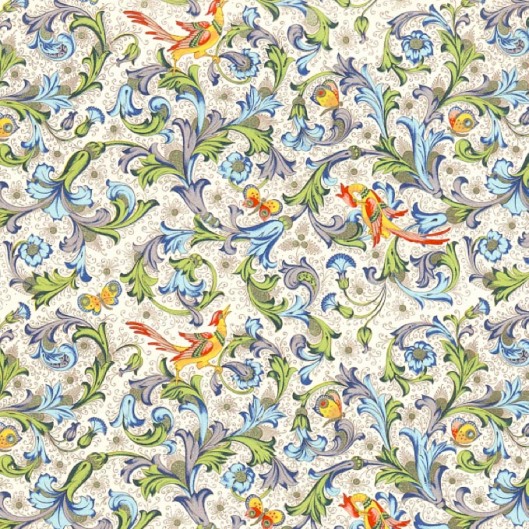
I found one paper, an Italian Cavallini sheet, featuring a range of insects. So pretty!

In-Cavallini

But that was it for variety.

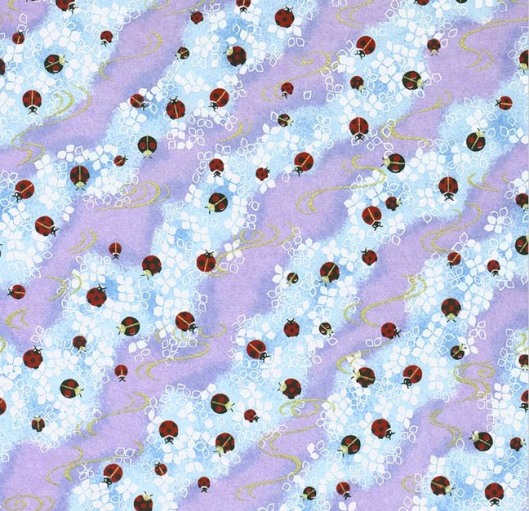
Ladybugs show up now and then, as in this Japanese Chiyogami sheet. In Japan, as in many cultures, ladybugs signify good luck.

In-Chiyo-Ladybug

And dragonflies are popular in Japan, too, where they represent power, agility and victory.

In-ChiyoDragonBlue

In-ChiyoDragonYellow

This Nepalese paper also features dragonflies. Depending on the culture, dragonflies can represent everything from evil spirits to transformation and rebirth.
In-DragonRedGold

But the most popular insect by far is the butterfly.

From Italy, a few beauties. First, butterflies as a detail in a Florentine paper, followed by two Cavallini sheets.

In-FlorentineButter

In-Cav1 In-CavButt2

A batik paper from Thailand:

In-Batik

A screen printed metallic sheet from Thailand:

In:ButtSilver

I’m not sure where this paper comes from.

In:ButterMulti

And of course butterflies are found in Chinoiserie scenic papers…

In:Chinoiserie

… as well as in collage-style Italian papers.

In-Cav1Butt In-Cav2Butt

Butterflies are wildly popular in Chiyogami papers from Japan, where they signify joy and longevity, and the souls of people both living and dead.

In-FaveButterChiyo

In-ChiyogamiButBlue

In-ChiyoGreenButter

In-ChiyogamiRedButter

In-ChiyoButtGrey

So I’ll keep hunting for papers with insects, and maybe one day I’ll find one printed with beetles. I’ll end this post with one of my all-time favorite insect papers. I was so surprised when I found it that I bought it without hesitation. All I have left now are little scraps. But how could I resist a bright orange sheet covered in a swarm of little ants?

In:Ants


The Paint Doctor Returns… with a Comb

Tags

, , , , , , , ,

Artists use all kinds of tools to get the effects they want, and decorative painting has its own bag of tricks. I remembered this recently when I had to match up a repaired base board to an existing wall which had been wood grained by someone else using some serious comb work.

This woodgraining is part of a fantastic foyer in a client’s apartment. The entire room is faux woodgrain, done in a unique style I’ve never seen before. The combs have created a relief pattern on the surface, so the painted wood is three dimensional, and when you walk into the room, the walls look exactly like real oak.

Here’s a small section of the wall that was painted by another artist. This is a flat wall. The three-dimensional trompe l’oeil effect of the molding is painted.

FauxOakWall

Here’s a detail. This work is phenomenal. It not only looks like wood, it feels like it, too. The control that the artist had with his combs is impressive. Look at the variations in the colors and how clean and crisp the combing is, with a thin glaze of creamy white on top to knock back the graining and give the effect of whitewashing.

FauxOakClose

There are all sorts of different combs that can be used to create patterns. Below are a few. The big orange comb on the far left is similar to the one that was used to create the pattern in the walls above. It creates graduating lines that mimic real wood.

Some of the other combs: top left are white and red custom combs that I cut at a specific size for a certain job; the triangular comb has three options; the metal combs come in sets at various tooth widths, and the center bottom orange comb has both pointy and straight teeth.

Combs

Below is our patient. A portion of the baseboard has been replaced, and I have to repaint it to match the existing finish. The installers managed to mangle the wall above the baseboard, so that has to be fixed, too. After measuring the comb’s marks, I went home and discovered that I had an almost identical comb. Hooray! If that hadn’t been the case, I would have custom cut a comb to match the pattern.

Base1

We start off with taping, floor protection, patch, sand, prime and base coat. Everything in this process is water-based. Next up, a light glaze to create the correct undertone for the combing.

Base2

Right away, here we go with the comb. The glaze has to be dark to stand out because there are more layers going on top. I also started filling in the damaged area above the base board using small brushes and liquid acrylics.

Base3

The next couple of glaze layers knock back the starkness of the combing while creating an irregular whitewash effect as seen on the rest of the wall.

Base4

And here we are, all matched up. That took about two hours and the help of a blow drier.

Base6

Combs are commonly used when painting oak, since they break up the figure pattern in a realistic way, mimicking the choppy grain. Below is a sample of painted oak with a very strong figure grain. The vertical lines that scratch through the darker figure pattern and side grain are created by pulling a comb through the wet glaze after the figure pattern and side grain have been completed.

Oak

Below is a close up of a European Oak grained door that I’m working on this week. I’m matching this door to the existing wood in a Library. This is the first coat of glaze. The glaze is rolled on, then brushed out with a chip brush. The first comb, a rubber one, has 1/8-inch teeth set 1/8 inch apart. It’s dragged down once, following the curves I’ve created with the brush. This comb is then dragged again at a slightly different angle, which naturally creates moiré patterns. Then a metal comb with much thinner teeth set close together is passed over twice at other slight angles, further breaking down the paint into different organic patterns. This may look complicated, but it’s all done naturally by the combs and perfectly mimics the patterns of the real wood in the rest of the room.

PierreOak

Combs can also be used to create all sorts of pretty patterns that can be glazed onto walls as well. This is a criss-cross combed pattern. First one direction is combed, and after it has dried, the other direction is combed on top. Finishes like this are usually created in muted colors because bright colors would give you a migraine and overwhelm a room. I apologize for all of the beige in this post!

CombedFin1

The example below of a striped combed pattern shows a few of the beautiful effects that combs can produce. The irregularity caused by freehand combing is part of the charm. Sometimes levels are used to create perfectly straight combing, especially on large walls. At which point I say, if you want perfection, use wallpaper!

CombedStripe

The best part about combs is that if you cut your own, the pattern possibilities are endless.

Visiting the Olympic Peninsula and the Hoh Rainforest

Tags

, , , , , , , ,

In September 2012, Tom and I visited the west coast. After spending a few fun days in Vancouver, we drove south, hopped on a ferry to the Olympic Peninsula in Washington, and spent two days driving around.

MapVancouver

What attracted me to the Olympic Peninsula was the Hoh Rainforest near Forks. I’d never walked through a rainforest. And how does a rain forest end up here, anyway? This is the wettest part of the U.S., at about 175 inches of precipitation a year.

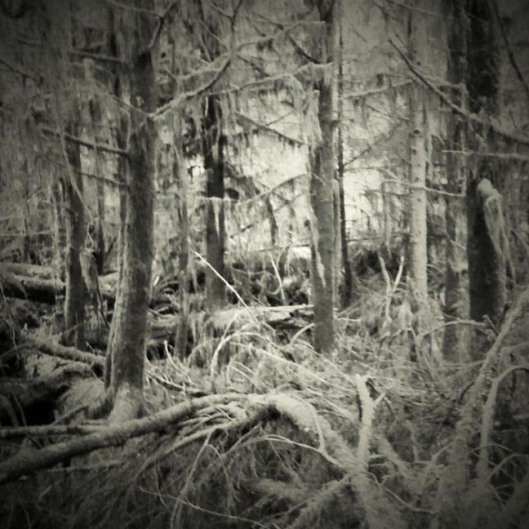
Unfortunately, I didn’t think it through when it came to choosing a camera. I wanted to shoot with my Diana camera. Rain forests are not bright and sunny places, and even with 400 speed film, the widest aperture and the accident of a sunny day, this gorgeously murky forest was way too dark for my camera. The three shots below were the only ones on the entire roll that managed to materialize. Don’t you hate it when stuff like that happens? Live and learn.

Hoh2

Hoh1

Hoh5

Here are two shots from my phone. What a place! Even on a sunny day, perfect for a spooky fairy tale.

Rainforest1

Rainforest2

Of course, my Nikon had no trouble at all. The root systems of these enormous trees were incredible.

HohBW3 HohBWRoots

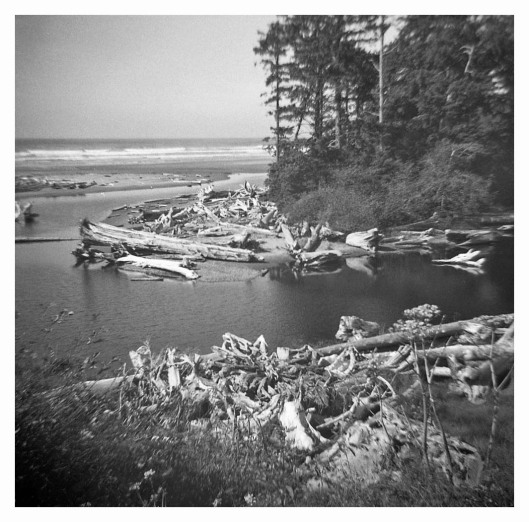
After the forest, we headed south to Ruby Beach, known for its wildly photogenic appeal. No disappointment there. What a beautiful spot. My Diana cameras had a field day in the bright light.

Beach1

RubyBeach7

RubyBeachRock1

Beach4

Beach2

We stopped for lunch next to this driftwood-filled bay.

RubyBeachLunch1

RubyBeachLunch2

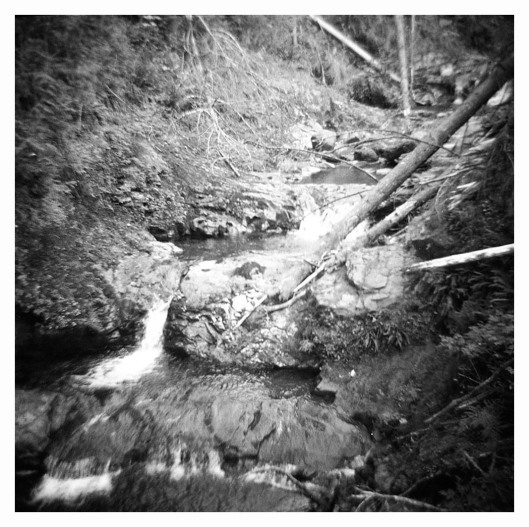
By afternoon, we’d arrived at Lake Quinault, where we took another stroll in the woods. This was also considered a rainforest, but was quite different from the first, dense and scrubby and not as mossy, although the trees were still skyscrapers.

OlympicStump

OlStream1

OlympicWaterfall

We spent our last evening at the lovely Lake Quinault. This photo was shot from the restaurant where we watched the sun set while eating dinner, before heading north and home. A memorable trip.

Quinault


Catching Up

Tags

, , , ,

Hi everyone, I’m sorry that I’ve been silent for a few months. Between work, fixing up my new apartment and trying to find photographic inspiration, I was completely distracted. But things are calming down again. So, what’s happened in the meantime?

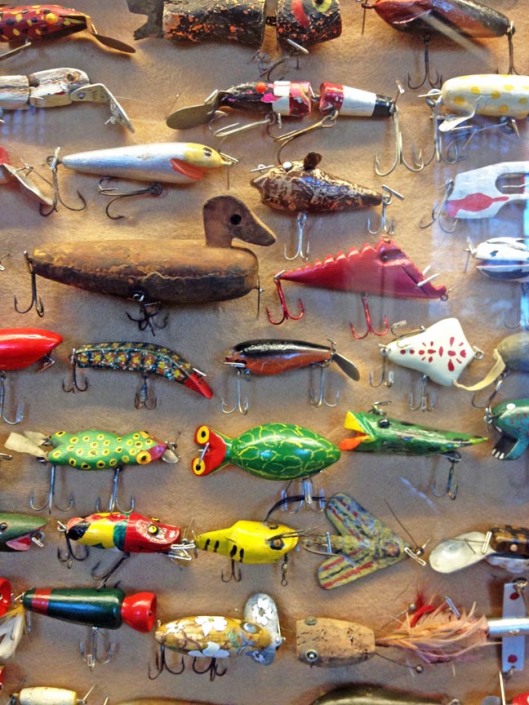
In January, I traveled to Little Rock, Arkansas for a glazing job. On our last day, we stopped by the Central Arkansas Nature Center. Ironically, almost all of the nature inside was dead and stuffed, and an exhibit about native wildlife attributed the destruction of the great buffalo herds in the 19th century to loss of habitat. Loss of habitat? Not proliferation of bullets? However, we did see a great exhibit of fishing lures. Some were handmade, others not, but all were beautiful and the inventiveness and playfulness of the lure designs was amazing.

Lures

Blizzards started rolling through NYC. This is the view from my new office/studio/guestroom. Hello Fort Tryon Park!

SnowView

With an assistant, I glazed this Park Avenue lobby in various shades of cream.

ParkLobby

It was time to experiment with a new pinhole lens for my Nikon D3000. I tried it for a couple of weeks and I really wanted to like it, but it left me cold. My photos bored me to tears. So much for that.

ColorPin

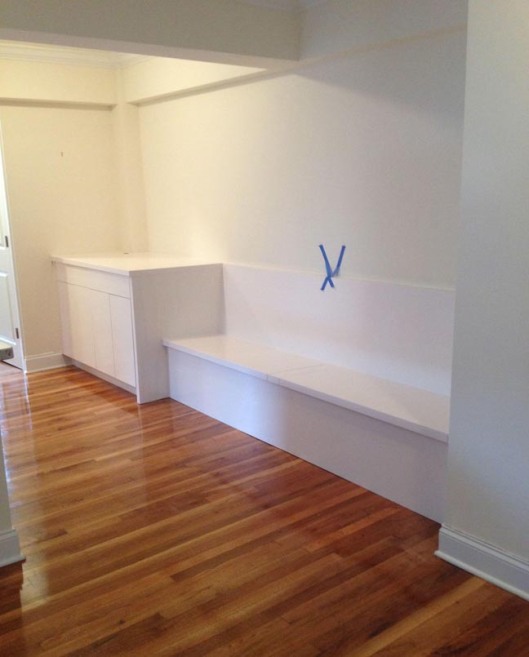
Next up, tackling the dining area in my new place. In NYC, some apartments have a dining nook, which is basically a glorified hallway leading from here to there, but widened out by a couple of feet to give the illusion that a table, chairs and family of four could somehow wedge themselves into this sorry excuse for a room. I decided to have a cabinet maker build a long banquette bench with storage inside and extra cabinets for even more storage at one end because in a New York apartment, storage is king. The distance from the wall on the right to the countertop on the left is just under seven feet. Here’s the before shot.

DiningBefore

Here’s the after shot. Missing: bench cushions, table, chairs, and wall treatment. I’ll write a separate post about the process with more details once I’ve finished everything up; it will include the most fantastic table ever. It was such fun to design and pull this space together.

DiningAfter

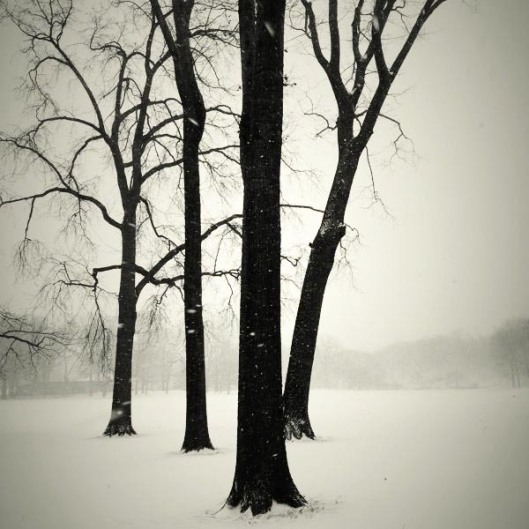
More blizzards. Central Park, lovely in the snow.

Snow4

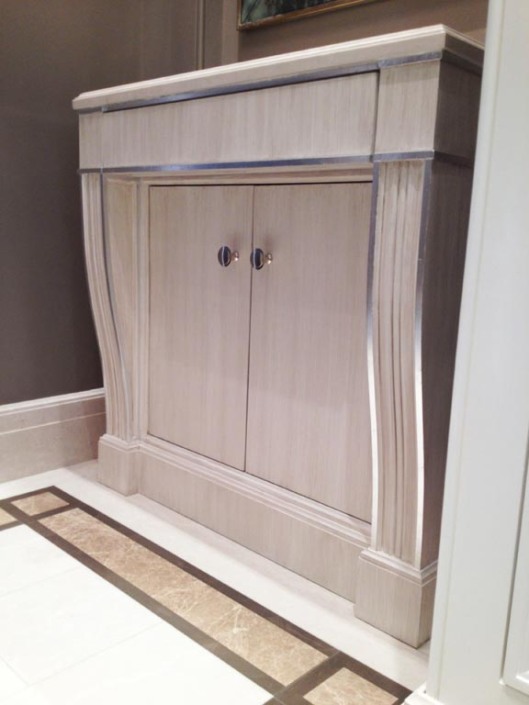
I glazed and gilded this little cabinet in a client’s entryway.

Cabinet

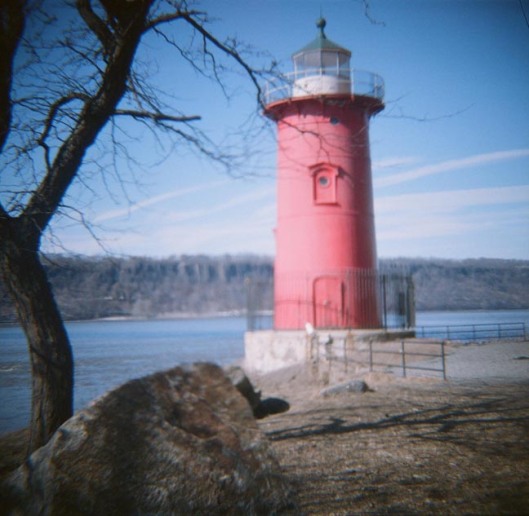
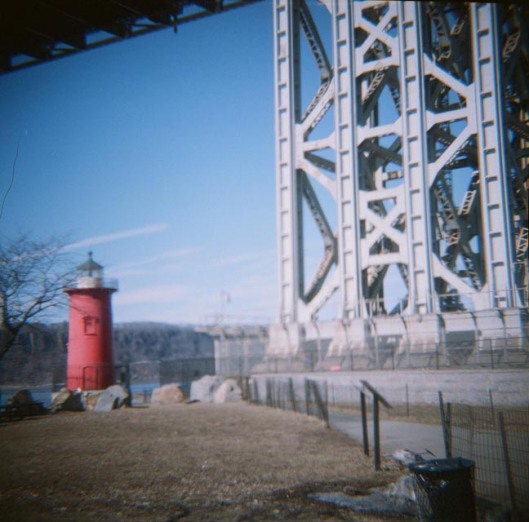
Thought I’d try shooting in color for a change, so I stuck a roll in a Diana camera and went out for a spin. This is the Little Red Lighthouse at the base of the George Washington Bridge, a few blocks south of my apartment. I love film!

RedLH1

RedLH2

Still shooting with my phone while exploring my new neighborhood. This is the Henry Hudson Bridge, which spans the Harlem River where it meets the Hudson River, connecting Manhattan to the Bronx.

HHBridge

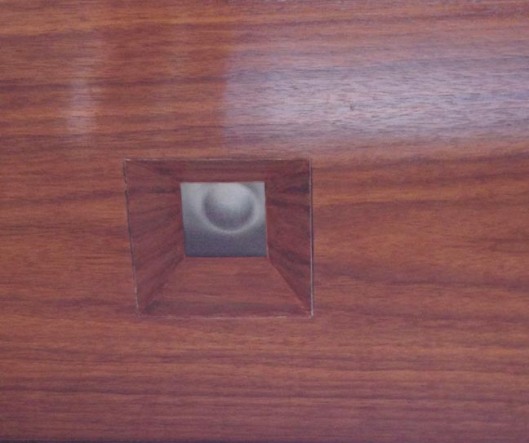
Spent a couple of days matching switch plates to oak and marble.

OakPlate

Bought a film scanner, so I can finally scan my neglected negatives. These photos are from a September 2012 trip to the west coast, the Olympic Peninsula in Washington state, that I’d never printed. When I left my last apartment, I left behind my darkroom, aka the windowless kitchen. I was so tired of setting up and tearing down my darkroom whenever I wanted to print that I hadn’t printed in over a year. Of course, now I miss it and want a darkroom again. I hauled all of the darkroom stuff here, but haven’t quite figured out how to create a darkroom in a place that’s full of windows. Stay tuned on that.

RubyBeachLunch2

RubyBeachRock2

More color matching, this time light caps in a mahogany-paneled ceiling.

MahoganyLight

Did I mention how much it snowed?

Snow3

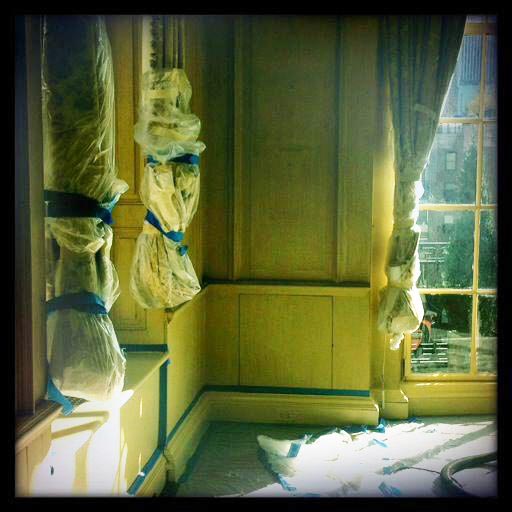
And last but not least, I started a photo project on my iPhone using the Retro Camera app. Usually when I work in someone’s apartment, there isn’t much to photograph when I’m done, since the rooms are emptied out before I begin and my painted finishes are often subtle. So I thought it would be fun to photograph details of the rooms in progress. Here, all of the drapes are wrapped in plastic for protection, portions of the walls are taped for glazing and the floor protection has been pulled away to tape off the base boards.

WrappedRoom

That sums it up for now. I’ll be back to posting regularly. Thank you for reading and following me!