I’ve been working on my dining nook for a while now, trying to bring it all together. It’s not much of a space: about five feet wide and twelve feet long, basically a glorified hallway between the front and back of the apartment. I decided to gild the wall with aluminum leaf.
Why gild at all? It’s slow, smelly and incredibly messy. Here’s why: because it’s amazing what a difference a reflective surface can make. Plus it’s really fun!
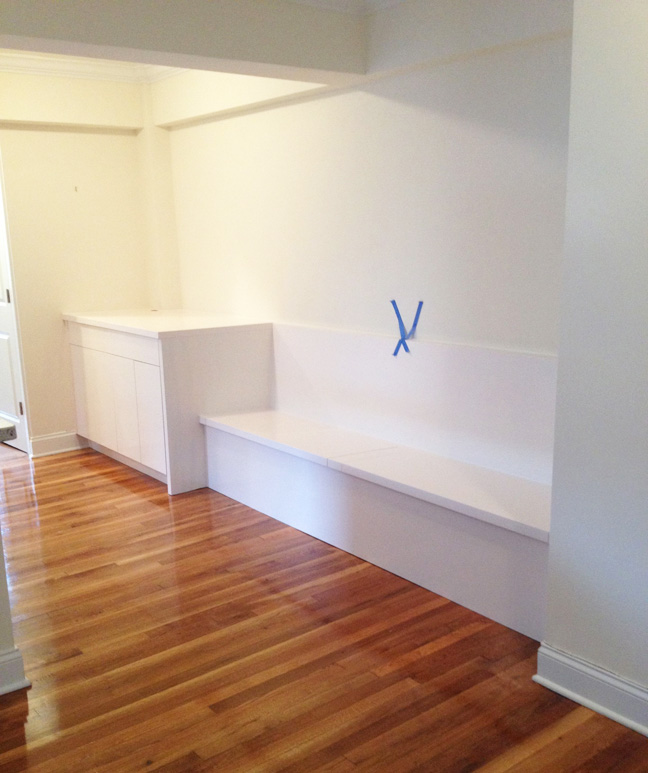
This is the darkest corner of the apartment. It gets eastern light in the morning, and once the sun moves, gloom descends. So I have to put something reflective on the wall to bring in light, and I’m not a big mirror gal. And the wall is a workable size, about 4 feet tall, manageable by myself.
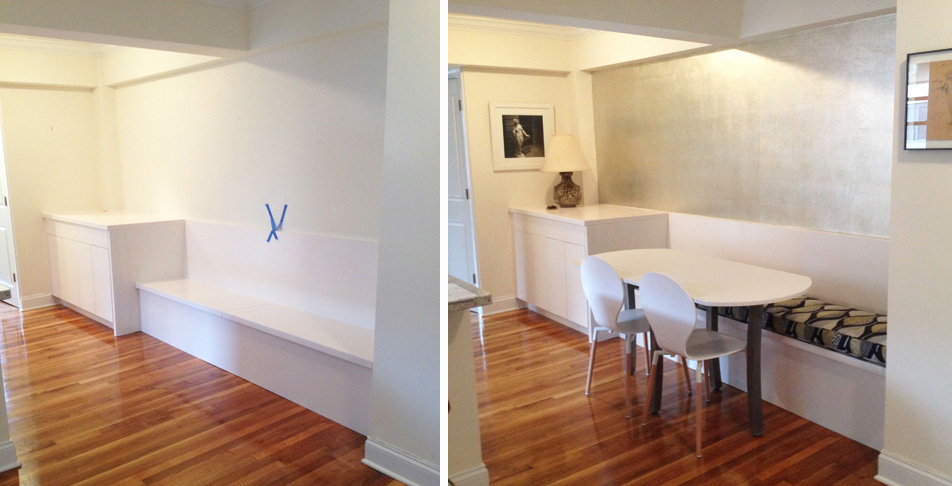
Here’s what I started with, a freshly installed banquette bench with cabinetry and a very white wall.
First step, prep: protect everything with plastic, tape out the wall with low-tack tape, then base coat in an oil-based light grey, similar to the tone of the aluminum leaf.


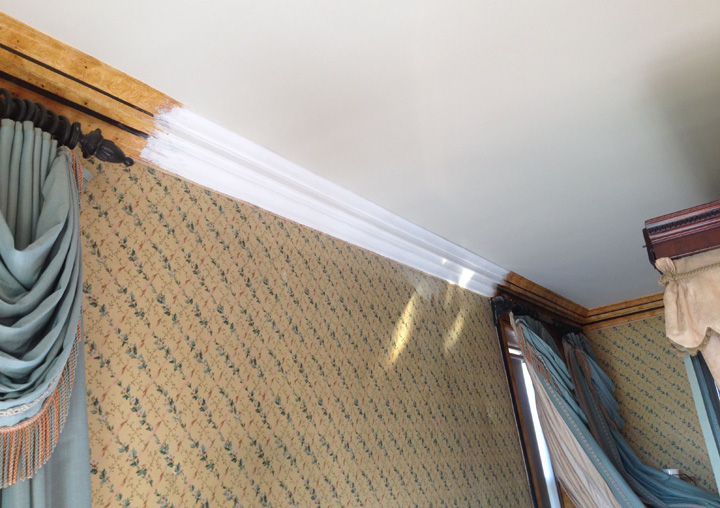
The trickiest part of gilding is staying level and square. Drawing parallel lines on the surface with a sharpie lets me know where the leaf should go. The lines are 6 inches apart because that’s the width of the leaf.

The leaf is stuck to the wall using oil size, a type of glue. The size is rolled on with a regular paint roller, then brushed out with a natural bristle brush. It has to come up to the correct tack before the leaf can be applied, which takes about 90 minutes, depending on how much it’s been diluted. The surface is workable for several hours.
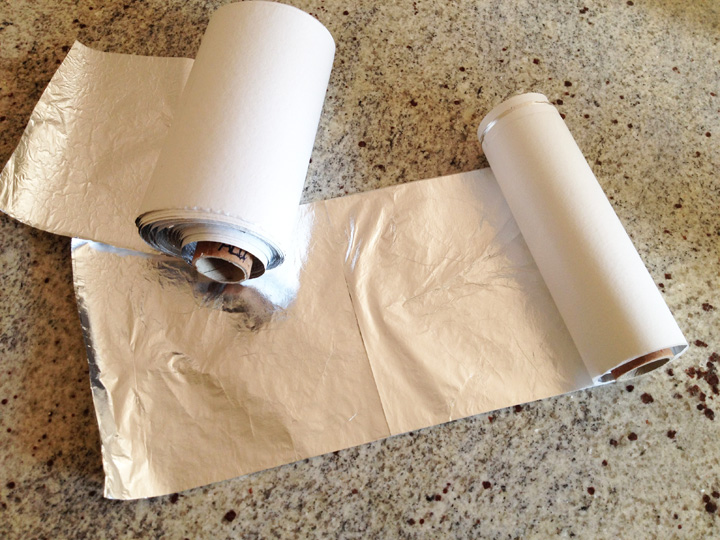
I’m using rolls of ribbon leaf, cut into sections five squares wide. Gilding with individual leaves would take forever; this makes the job much easier and creates better results.
And then it’s time to start gilding, from bottom to top and right to left. From the bottom so leaf doesn’t fall onto the sized surface, and from the right because mistakes will be made at the beginning.
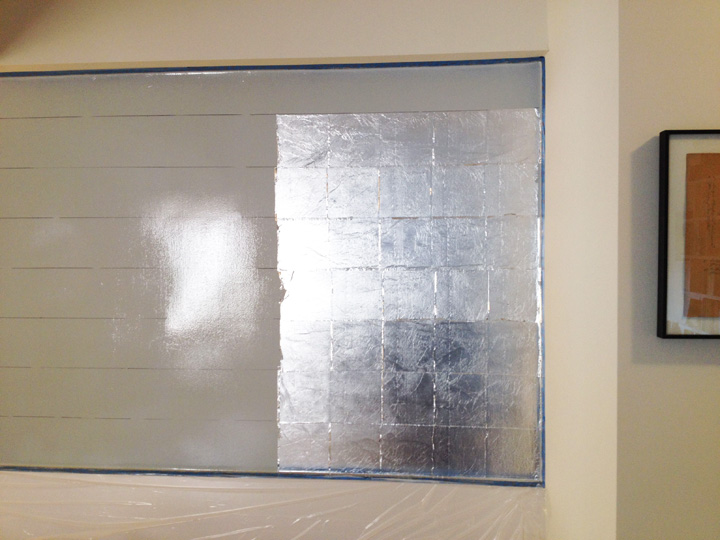


Each leaf overlaps the next one by 1/8 of an inch. So when the wall is done, all of that overlap is fluttering in the breeze.

Once the wall has dried overnight, the overlap is cleaned off with a soft brush, which creates a huge mess, tiny bits of leaf floating off in all directions. Below is the completed wall. As the photos above progress, you can see the light leaving the room as the morning sun moves to the south.
I turned off the lights to show how much the leaf reflects indirect light.

So here we are with everything back in place.
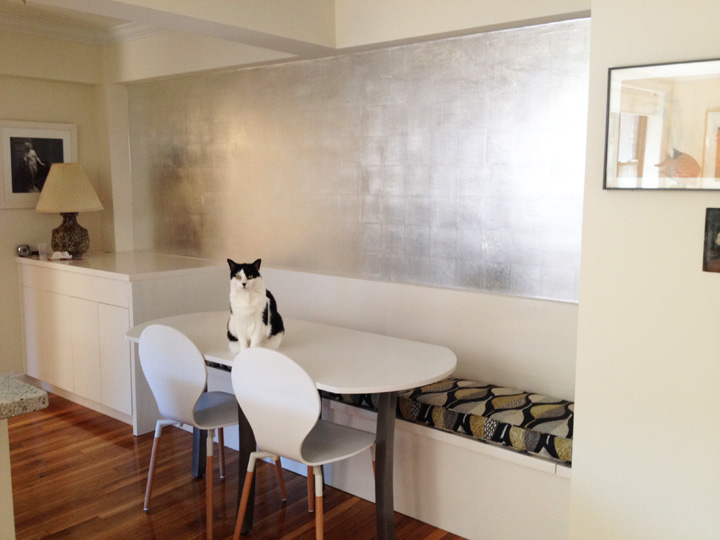
Tons of light, right? And the wall changes as the light changes. What a difference. But I’m not done; aluminum looks very cold and hard, and I don’t want the dining nook to feel chilly. The wall needs an overglaze to knock back the reflection and warm it up.
To coordinate with the green in the bench cushions, I mixed a dirty green. Green is one of those colors that can read as cold or warm, depending on what it’s next to, since it’s a mix of blue and yellow, cold and warm.
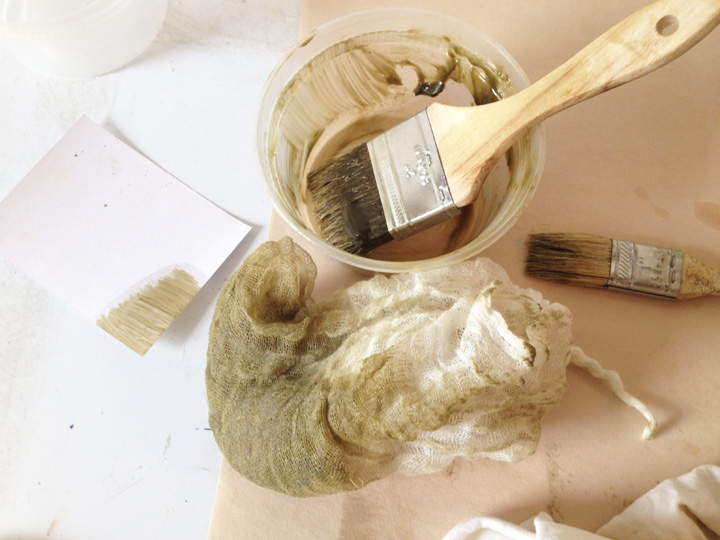
The glaze is made with Windsor and Newton Liquin mixed with tube oil colors. Liquin is an oil-based medium used to speed drying time, and it’s the only medium I know that stays translucent over gilding. The glaze is applied with a chip brush and gently pounced with cheesecloth to give it a bit of texture.


Even though the green seems really strong as it goes on, it ends up looking subtle. The refection of the leaf is no longer glaring, although it still softly reflects, the tone is warmer and now the wall is visually integrated with the dining nook’s palette.
A couple of shots of the finished wall with the lights off in the late afternoon. The light from the window across the room now bounces off of the leaf.


And with the lights on.

Before and after. Still waiting for my light fixture to arrive.
The table is custom made and I love it. That’s a story for another day!